User interface > Main menu > Menu: Windows > Docking Windows
You can customize panel layouts in TextTransformer and create custom docking schemes. This feature is especially convenient for smaller display resolutions, since it allows you to display several panels simultaneously.
The relative size of the windows mostly can be changed with the mouse. If the mouse is positioned over the borderline of the two blocks the mouse pointer changes its form to
![]()
While pressing the left mouse button you can drag the line to the new position, where it remains, if you let off the button.
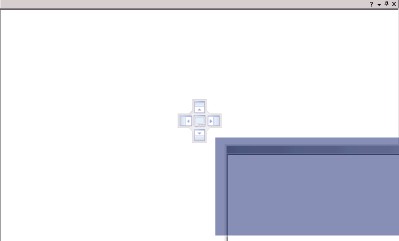
To undock a panel, simply double-click or drag the panel’s caption. This will turn the panel into a normal, floating window. You can quickly dock a floating panel back to its previous location by double-clicking the panel caption. If you want to change the panel location, drag it to the desired place. When you are dragging the undocked panel over another panel, TextTransformer will show the docking zone selector, which lets you specify where the panel will be docked if you release it:

To dock a panel to the left, top, right or bottom edge of the the lower panel, move the mouse cursor to the ![]() ,
, ![]() ,
, ![]() or
or ![]() icon within the Selector and then release the mouse button. Once a floating panel has been docked onto another panel, it still has a caption bar, with a name at the left and buttons at the right, and the previous contents likewise have a caption bar on top of their section of the page. Any section can again be turned into a floating window by dragging the caption.
icon within the Selector and then release the mouse button. Once a floating panel has been docked onto another panel, it still has a caption bar, with a name at the left and buttons at the right, and the previous contents likewise have a caption bar on top of their section of the page. Any section can again be turned into a floating window by dragging the caption.
If you select the ![]() icon in the docking zone selector, the floating panel and the lower panel will be docked at the same spot. In this case, the panels will be organized as tabbed pages (tabbed panels are simply panels docked not inside one another, but at the same spot). You can dock more than two panels to the same spot. To undock a tabbed panel, just drag or double-click its caption.
icon in the docking zone selector, the floating panel and the lower panel will be docked at the same spot. In this case, the panels will be organized as tabbed pages (tabbed panels are simply panels docked not inside one another, but at the same spot). You can dock more than two panels to the same spot. To undock a tabbed panel, just drag or double-click its caption.
Note that when you are dragging a float panel over a tabbed one, besides the docking zone selector in the center of the tabbed panel Automated Build Studio will also show docking zone selectors along the edges of the tabbed page.

These selectors let you dock the floating panel relative to the whole tabbed spot. Using the central selector you will dock the floating panel to the the tabbed panel that is currently in front of the other tabbed pages.

If you select this variant, then the tabbed page will hold two panels.
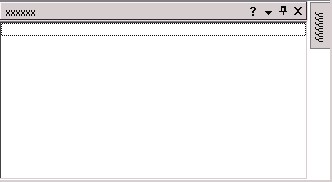
A docked panel can be auto-hidden. Auto-hide means a panel can be minimized along one of the sides of the docking site, so only the panel’s caption remains visible. For instance, on the following figure the "yyyyyy" panel is auto-hidden:

To hide a panel, click the ![]() button in the panel’s caption.
button in the panel’s caption.
To view an auto-hidden panel, move the mouse cursor to the panel caption or click the caption and the panel will pop up.
To show a hidden panel, simply click the ![]() button in the panel caption.
button in the panel caption.
Right-clicking a tab shows the context menu with the following items:

Rename Calls the Panel Caption dialog where you can rename the tab.
Help The Help item is displayed if the tabbed page contains one panel only. It calls the help topic with the panel description. If the tabbed page holds several panels, the Help item is hidden.